The summer show season is drawing to a close, which means a couple of things. Most importantly, to me at least, I will now be able to breath once and awhile. Also I will start to dive more seriously into the many commissions I have piled up. Some of these won't make it here, I am working on getting publications to cover a few and they need the content to be original. However this one will:
Really excited about this piece, I will be making a base to a wall hanging I made a few years ago, turning it into a coffee table. And yes, it will have brass lions feet toe caps.
This blog is intended to be a direct window into my workshop. It is intended to unveil the processes, joinery, and materials that are so crucial to the production of Five Fifths Furniture. Check back often for updates on current projects, future shows and expeditions to procure new and fascinating materials.
"Live" Edge
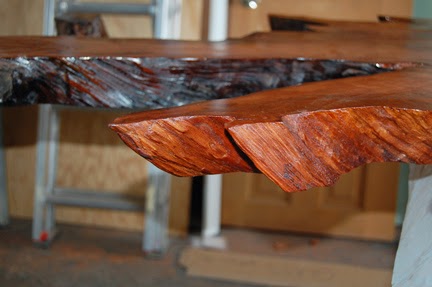
It is a misnomer that the liveedge we hear so much about in contemporary furniture naturally emerged out of the tree fully formed like Athena from Zeus's head. Unless you intend to just cake the bark with finish, and in turn be left with a lifetime of debris as bark and rotten weak bits fall off from use, a liveedge demands a lot of human intervention. However, like bad open mic night performances, there is nothing worse than an unnatural liveedge on a piece of furniture. A successful liveedge is an artistic dance with nature, utilizing many tools to mimic her lines so that the man-made and the natural appear identical even under the sharpest scrutiny. Every bit of bark and other weak parts must be removed so that only the most solid edge is left. The following photos are from a Redwood Table that lost, on average, 3-6" of material around it's perimeter from rot and cracks, most of the liveedge is a fabrication, however if I never would have told you, would you have known?
Side note.
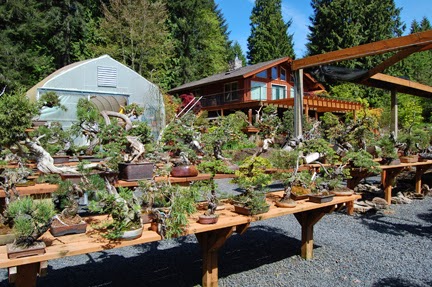
The table went to professional Bonsai Artist Ryan Neil. Wonderful trees and a wonderful garden outside of Portland. These are just a few fun shots.
I will be making a stand for this tree next month.
Where have I been.
I have been wrapping up a very large Redwood Conference Table Top- I say top as we are still exploring a base for the table. The two Slabs old logged stumps that have been dug up later and slabbed. The outside edges are the root ball and the center is roughly were the tree was cut down. Since the stump sat dead and exposed for all those years the rot in the pieces was rather extensive. About 8 hours went into the liveedge with about 3" of material lost around most sides. The Butterflies are all that is holding on the left chunk. Came out well, everyone was happy.
It looks small but the table is rather large, it has roughly the same footprint as my truck.
Your car should work for you, not you work for your car.
Everything still works, that includes my back. A very big thank you to the 5 volunteers who came out to make this happen, just some 2 by 6's, towing straps and muscle. Not as hard as anyone expected it to be. Makes you understand how the pyramids were built just a little more.
Estimated weight: 850 lbs
18" at base near 30" at the crotch, 7' long
Field Maple, Acer Campestre
of the hard maple variety, unusual for these parts, actually it is a European tree, quite compatible with the Portland climate.
Estimated weight: 850 lbs
18" at base near 30" at the crotch, 7' long
Field Maple, Acer Campestre
of the hard maple variety, unusual for these parts, actually it is a European tree, quite compatible with the Portland climate.
Cutting top joinery
The frame members are each 7" wide and under. They have to support nearly 100 lbs of glass so the joinery must be bullet proof. I cut a 1/2 floating tenon into each mahogany piece and a 1/8" floating tenon into the maple pieces, mostly for alignment, but also to keep the angled glue-up form flexing its way apart over time.
Just a size comparison on the frame. Imagine the glass.
Now the edge profile can be routed. Held off on this so I had more surface area for the ratchet straps to hold. Also to keep from damaging the profile.
Now they are ready to be glued up.
Again a two person task.Now the edge profile can be routed. Held off on this so I had more surface area for the ratchet straps to hold. Also to keep from damaging the profile.
Ready for finishing.
Finally.
Detail of the dovetail key.
An approximation:
Subscribe to:
Posts (Atom)